Apex Vape Apex Vape

7 Best Tips How to Prime a New Coil Correctly?

Time:2026-09-21 Author:Sienna
0%

Learning how to prepare a replacement coil can make vaping equipment perform more consistently. It may also reduce harsh, burnt-tasting draws caused by insufficient liquid absorption. The question is simple: How to prime a new coil correctly? The answer involves patience, careful inspection, and attention to the manufacturer’s instructions.

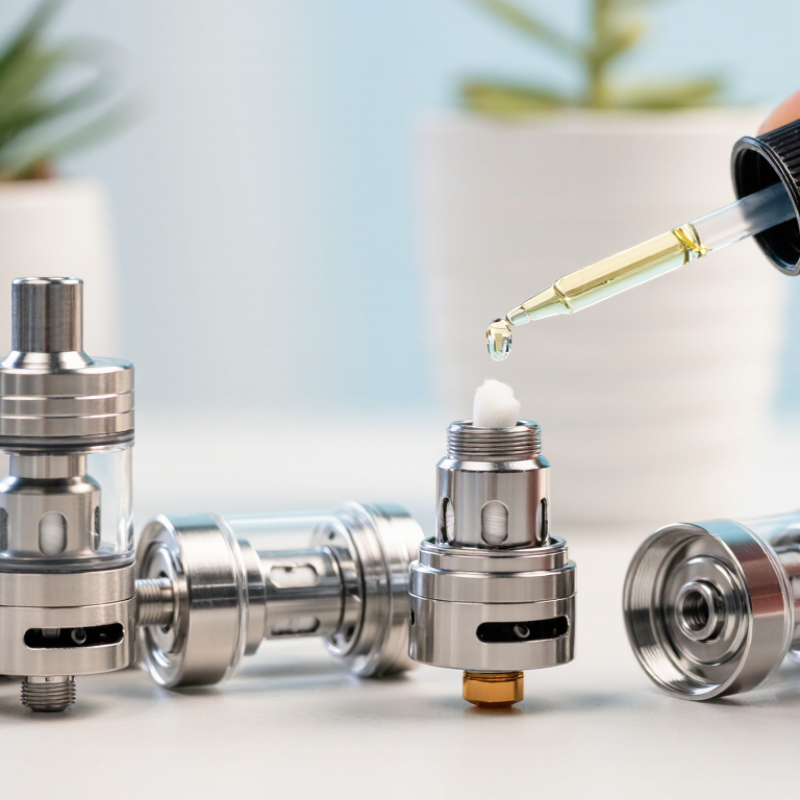
A new coil often contains dry cotton around its heating wire. Add e-liquid directly to the visible cotton openings, using only a few small drops. Avoid flooding the coil. Install it firmly, fill the tank, and let it stand upright for several minutes. Five minutes may be enough for some coils, while larger designs may need longer. This guide presents seven practical tips for checking the coil, choosing suitable power, and avoiding premature damage.

Start gently. Set the device near the lower end of the recommended wattage range, then take a few unpowered draws if the device permits it. Increase power slowly after confirming a clean, moist taste. Never activate a dry coil repeatedly. That mistake is easy to make, especially when replacing parts quickly. I have found that rushing this step often creates more trouble than it saves.

Check the tank for leaks, unusual gurgling, or a persistent burnt flavor. Stop using the device if it becomes unusually hot or damaged. Use compatible components, follow local regulations, and keep e-liquid away from children and pets. Good coil preparation is not complicated, but small details matter. A careful start usually gives the coil a fair chance to perform properly.
7 Best Tips How to Prime a New Coil Correctly?

Identify the Correct Coil Type and Confirm Its Installation

Before priming, identify the exact coil type required for your device. Check the user manual, coil label, resistance range, and connection style. Do not rely on appearance alone. Two coils can look similar but use different airflow paths or power limits. A mismatch may cause weak performance, flooding, or overheating.

Inspect the coil carefully under bright light. The cotton should be clean, dry, and undamaged. Check that the seals are seated evenly and that no threading looks bent. Install the coil straight into the base or pod. Turn it until snug, but avoid forcing it. Over-tightening can damage the seal and make removal difficult. Confirm the coil sits flush, with no visible gap. Small details matter.

Add the e-liquid slowly through the intended opening. Wet the exposed cotton, then wait several minutes after filling. Start at the lower end of the recommended power range. Use short, gentle draws at first. In practice, I sometimes recheck the coil after the first few draws because a slight leak can appear later. That extra check is not unnecessary. If the taste becomes harsh, stop using the device and let the coil saturate longer. A damaged coil should be replaced, not rescued. Proper installation is not always perfect on the first attempt, and noticing that early prevents avoidable problems.

Apply E-Liquid to Every Exposed Part of the New Coil

7 Best Tips How to Prime a New Coil Correctly?

Apply E-Liquid to Every Exposed Part of the New Coil

A new coil contains dry cotton that needs time to absorb e-liquid. Add a few small drops to every visible cotton opening around the coil. Do not wet only the top. The side ports matter too. Rotate the coil while applying liquid, and stop when the cotton looks evenly damp.

Install the coil securely, then fill the tank without covering the airflow path. Let it sit for five to ten minutes. Larger coils may need longer. Take a few gentle draws without pressing the fire button. This helps pull liquid into the cotton. Keep the power setting low during the first several puffs, following the coil’s recommended range.

Avoid flooding the center tube. E-liquid there can cause gurgling and leaks. I once rushed this step and raised the power too quickly; the first puff tasted harsh, and the cotton never recovered. That mistake reminded me that “fully wet” does not mean “soaked.” If the coil tastes burnt, stop using it and check the liquid level, airflow, and power setting. Small adjustments are safer than forcing more heat.

Fill the Tank and Allow the Coil to Saturate Fully

7 Best Tips How to Prime a New Coil Correctly?

A new coil needs complete saturation before heating. Fill the tank with suitable e-liquid, then leave it upright for 10 to 15 minutes. Thicker liquid may need longer. Check that the tank is not overfilled. Airflow holes should remain clear. I once rushed this step and noticed a harsh, dry taste immediately. That mistake was avoidable.

Tips: Add a few drops of e-liquid directly onto the visible cotton openings, if the coil design allows it. Do not flood the center tube. After installing the coil, gently inhale without pressing the power button. This helps draw liquid into the cotton. Keep the device switched off during this process. Small details matter.

Start at the lowest power setting listed for the coil. Take short, gentle puffs and increase power gradually. Watch for burnt flavor, unusual heat, or weak vapor. Stop if any of these signs appear. Let the coil rest longer and check the liquid level. A loose coil can also cause leaking or poor contact. Follow the device and coil instructions, since designs differ. I still find the waiting period difficult, especially with a fresh setup. Rushing feels efficient, but it often creates more work.

Begin Vaping at a Low Wattage and Increase Gradually

After filling a new coil, let the liquid soak for five to ten minutes. I also place a few drops directly onto the visible cotton openings. This prevents a dry first puff, though waiting times vary with cotton thickness and liquid viscosity.

Begin vaping at a low wattage, then increase gradually. Start near the lower end of the coil’s recommended range, using short two-second puffs. Raise power by one or two watts, then pause and check the taste, warmth, and vapor. Stop when the flavor becomes clear and comfortable. A burnt, papery taste means the coil may already be damaged. Do not “push through” it. That is a mistake I made when learning.

The National Academies’ 2018 report noted that heating conditions can affect harmful chemical formation in aerosol. A study in Environmental Science & Technology also found sharply higher carbonyl emissions during dry-puff conditions. These findings do not create a perfect wattage rule, but they support gentle ramping and adequate liquid flow. Record the setting that works, because memory is unreliable. Even experienced users sometimes increase power too quickly.

Recognize Common Priming Mistakes and Replace the Coil Safely

A new coil fails fastest when its cotton is heated before it is fully saturated. Apply e-liquid directly to the visible cotton openings. Fill the tank, then wait at least ten minutes. Take two gentle, unpowered draws. Do not rush this step. ISO 20768:2018 specifies 55 mL puffs lasting three seconds in routine testing. Your real puff may be longer, so begin below the coil’s recommended power range. Use short puffs and increase power gradually.

Common priming mistakes include overfilling, inhaling too forcefully, and ignoring a burnt smell. A flooded coil may gurgle or leak, while a dry coil tastes sharp and unpleasant. CORESTA Recommended Method No. 81 highlights how puff duration, interval, and power influence aerosol generation. These conditions also show why careless settings can stress a new coil. I still sometimes increase power too quickly; that mistake is easy to repeat. Pause between puffs, especially during the first few minutes.

Replace the coil when the taste stays burnt, vapor becomes unusually weak, or the cotton looks dark. Stop using it if the tank leaks onto electrical contacts. Turn the device off before replacement. Remove the old coil with dry hands, wipe excess liquid, and check the seal. Install the new part firmly, but do not force the threads. Dispose of used coils according to local waste rules. The U.S. Fire Administration advises keeping lithium-ion devices and batteries away from heat and damaged components. A sound coil cannot compensate for unsafe hardware.

7 Best Tips for Priming a New Coil Correctly

These reference durations reflect common coil-priming guidance: saturate the visible wick, fill the tank, allow several minutes for absorption, and begin at low power. Avoid dry-firing, chain vaping, and exceeding the coil’s recommended wattage. Replace the coil if it tastes burnt, produces unusually little vapor, or remains harsh after proper priming.

FAQS

Why does a new coil need priming?

New cotton is dry. It must absorb e-liquid before heating begins.

Where should I apply e-liquid?

Add small drops to every visible cotton opening. Include the side ports, not only the top.

How much e-liquid should I add?

Dampen the cotton evenly. Do not soak it or flood the center tube.

How long should the coil sit?

Keep the tank upright for 10 to 15 minutes. Larger coils or thicker liquid may need longer.

Should I inhale before activating the device?

Yes. Take a few gentle draws without pressing the power button. This helps pull liquid into the cotton.

What power setting should I use first?

Start at the lowest listed setting. Take short puffs, then increase power gradually.

What signs suggest the coil is not ready?

Stop if you notice burnt flavor, unusual heat, or weak vapor. Check the liquid level and power.

Can too much e-liquid cause problems?

Yes. Liquid inside the center tube may cause gurgling or leaks. Small amounts work better.

What mistakes should I avoid?

Do not rush the waiting period. I once raised the power too quickly, and the harsh taste remained. Small steps help.

What should I check if the coil performs poorly?

Check the coil’s fit, liquid level, airflow, and power setting. A loose coil can cause leaks or poor contact.

Conclusion

Learning how to prime a new coil correctly? Start by identifying the proper coil type for your device and checking that it is installed securely. Apply a small amount of e-liquid to every visible cotton opening, avoiding excessive liquid that could cause flooding. After fitting the coil, fill the tank and let it sit for several minutes so the wick becomes fully saturated. This waiting step helps prevent dry hits and improves the coil’s performance.

Begin vaping at the lower end of the recommended wattage range, using short, gentle puffs. Increase the power gradually only when the vapor production and flavor feel consistent. Common mistakes include vaping immediately after filling, using too much power, applying too much liquid, or ignoring unusual burnt flavors. If the coil tastes burnt, produces harsh vapor, or continues to perform poorly, stop using it and replace it safely according to the device instructions. Proper preparation can extend coil life and provide a smoother experience.

Sienna

Sienna

Sienna is a skilled marketing professional with a deep expertise in our company’s core products and services. With a passion for innovation and detail, she plays a pivotal role in crafting insightful blog posts that not only highlight the unique features of our offerings but also provide valuable......